Copyright Notice
Licensed under a Creative Commons Attribution 4.0 International License. To view a copy of this license, visit https://creativecommons.org/licenses/by/4.0/.
Bookshelf ID: NBK599393

An official website of the United States government

NCBI Bookshelf. A service of the National Library of Medicine, National Institutes of Health.
Reuter-Sandquist M; Open Resources for Nursing (Open RN); Ernstmeyer K, Christman E, editors. Nursing Assistant [Internet]. Eau Claire (WI): Chippewa Valley Technical College; 2022.
• Examine types and uses of restraining devices
• Use alternatives to restraints
• Assist with moving or positioning a client
• Promote joint mobility, body alignment, and activity
• Assist with ambulation
• Use client transfer techniques
• Apply prosthetic and orthotic devices
Mobility is the ability to move one’s body parts, change positions, and function safely within the environment. It is one of the most important factors for remaining independent. Immobility, the inability to independently move and change positions, is a major reason why people are admitted to long-term care facilities for assistance to complete their activities of daily living (ADLs). Declining mobility can negatively affect many aspects of one’s health, especially in the musculoskeletal, respiratory, integumentary, circulatory, and digestive systems. Complications of immobility will be further discussed in Chapter 9.
Nursing assistants (NAs) have a major responsibility for assisting clients who have decreased mobility. Some clients require minor assistance to ambulate safely or move from their bed to a chair, whereas other clients require full assistance for repositioning in bed and/or transferring. NAs also assist in maintaining a resident’s level of functioning by promoting joint mobility and applying prosthetics and orthotics. This chapter will review moving and positioning clients, as well as promoting their joint mobility.
In some circumstances, medical restraints may need to be applied to clients who are at risk for hurting themselves or others. This chapter will also review various types of restraints and how to prevent complications that can result from decreased movement.
When a resident is admitted to a facility or begins receiving home health care, assessments are completed by health care staff (including nurses, physical therapists, and occupational therapists) to determine their care needs. Examples of assessments include their ability to complete hygiene and grooming needs, as well as the amount and type of assistance required to safely reposition themselves in bed, move in and out of bed into a chair, and walk (if they are able). The findings from these assessments are implemented into the client’s care plan that the nurse and NA carry out. Roles of various therapists will be further discussed in Chapter 9.
As discussed in the “Skin Care” section in Chapter 5, clients who are immobile must be repositioned every two hours to prevent pressure injuries and other complications of immobility that will be further discussed in Chapter 9. Moving residents must be done carefully because their skin can easily be damaged by improper handling. Due to the effects of aging on the integumentary system, older adults can develop pressure injuries from friction and shear when repositioned or from lying in one position for long periods of time in bed. Pressure injuries (formerly called pressure ulcers or bedsores) are localized damage to the skin or underlying soft tissue, usually over a bony prominence, as a result of intense and prolonged pressure and/or shear.[1]
Shear happens when skin moves one way but the underlying bone and muscle stay fixed or move the opposite direction. Shear can occur when an individual sits up in a bed, chair, or wheelchair, and gravity causes the bone and muscle to slide down while the skin is pulled in the opposite direction by the sheets or clothing. Friction is caused when skin is rubbed by clothing, linens, or another body part and can cause chafing. Chafing typically occurs when the skin has inadequate moisture. See an illustration of sheer and friction in Figure 8.1.[2]
Friction and Shear Causing Pressure Injuries
For additional information on friction and shear, visit the Wound Care Education Institute’s Friction vs. Shearing in Wound Care web page.
To prevent friction and shear, residents should be moved in bed with a lift sheet. The lift sheet, also called a draw sheet, is placed between the resident and the bottom or fitted sheet. (Review types of linens in “Making an Unoccupied Bed Checklist” in Chapter 3.) The lift sheet protects the client’s skin by creating a barrier when the client is moved so the friction that occurs happens between the lift sheet and fitted sheet rather than the resident’s skin and the fitted sheet. Lift sheets also protect the client’s skin from bruising and skin tears that can occur when moving the client by assistants putting their hands directly on a client’s limbs. A skin tear is a separation of skin layers caused by shear, friction, and/or blunt force. Lift sheets should always be used to reposition a client who requires assistance, and failing to do so is considered neglectful due to the high probability of skin injury. See Figure 8.2[3] for an image of boosting a resident in bed with a lift sheet.
Boosting a Resident in Bed With a Lift Sheet
The steps for boosting a client up in bed include the following components[4]:
Review the “Body Mechanics and Safe Equipment Use” section in Chapter 3 to prevent yourself from injury during repositioning.
Pressure injuries are preventable by repositioning clients at least every two hours and reporting any skin redness or other changes to the nurse for additional interventions. There are several positions that can be used to relieve pressure points and keep residents safe from pressure injuries. Repositioning also promotes improved circulation through movement. Positions are described in the various “Positions” subsections below.
When a resident has an existing pressure injury or a susceptible area, an hourly repositioning schedule is typically implemented (rather than the standard two-hour repositioning schedule considered routine care for all residents requiring assistance with their mobility). Repositioning a client every hour should be documented, indicating the time and the positions the resident was moved from and placed into. An example of documentation is, “At 1400, the resident was repositioned from a right side-lying position to a supine position.”
Similar to how nursing assistants use good body alignment (i.e., good posture) to prevent musculoskeletal injuries to themselves, the same principle should also be applied to residents. Good body alignment not only prevents injury, but also promotes comfort for residents. After repositioning a resident, the NA should stand at the foot of the bed and verify that the resident’s spinal column is straight and parallel to the sides of the bed, as well as ensuring the resident is lying in the middle of the bed (to reduce the risk of accidentally rolling out of bed). See Figure 8.3[5] of an image of a properly aligned mannequin in the lateral position.
Properly Aligned Lateral Position
In addition to being caused by friction and shear, pressure injuries can occur in high-risk areas such as bony prominences or where a bone is lying directly on top of another bone. Bony prominences are the areas of the body where a bone lies close to the skin’s surface, such as the back of the head, shoulders, elbows, heels, ankles, tops of the toes, hips, and coccyx (i.e., tailbone). These areas are most susceptible to developing pressure injuries because they have the least amount of cushioning. Placing pillows or other specialized equipment reduces the pressure in these areas and also helps to prevent the resident from rolling out of position.
There are different sizes of pillows and equipment available in facilities to relieve pressure, prevent rolling, and increase client comfort. For example, foam wedges are placed behind a patient’s back to prevent them from returning to the supine position or rolling close to the edge of the bed. See Figure 8.4[6] for images of a wedge cushion and a client positioned using a wedge cushion.
Wedge Cushion Used for Positioning. Used under Fair Use.
Common positions used for repositioning patients are supine, Fowler’s, lateral, Sims’, and prone positions.
The most common sleeping position is the supine position, where the client is lying flat on their back as demonstrated in Figure 8.5.[7] Pillows or wedges can be placed on each side of the resident to promote comfort or to support a limb that is immobile or has impaired function. A pillow should also be placed underneath their calves to keep their heels off the bed and prevent pressure that can cause pressure injuries. (This pillow placement under the calves is often referred to as “floating the heels.”) After repositioning the client, the NA should be able to place their hand underneath the client’s heels to verify there is no contact by the heels on the mattress.
Supine Position
If a resident is highly susceptible to pressure injuries of the heels, they may have specialized soft foam boots, as illustrated in Figure 8.6,[8] that support the ankles and keep the heels floated off the bed. A foot cradle may also be used to keep sheets and blankets off the tops of the toes if the resident has a history of skin injury in that area.
Inside of Foam Boot (left) and a Foam Boot Supporting a Heel
In Fowler’s position, the client is lying on their back with their head elevated between 30 and 90 degrees, as illustrated in Figure 8.7.[9] Residents should be placed in Fowler’s position any time they are eating or drinking or when oral care is provided. Fowler’s position is also used to increase lung expansion for those with breathing difficulties, such as those that occur with heart failure. It may also be used for comfort during leisure activities such as watching television or reading. Additionally, residents receiving tube feeding should never have their head placed below a 30-degree angle because this can cause aspiration of the fluids.
Fowler’s Position
However, Fowler’s position increases the risk of friction and shear on the coccyx and gluteal muscles as the client slides down in bed. This risk can be reduced by concurrently raising the lower portion of the bed or by putting multiple pillows below the lower legs. These actions bend the knees and reduce the pull of gravity that causes the resident to slide down in bed. A pillow can also be placed below the feet to prevent them from contacting the foot of the bed.
Lateral (side-lying) position places the resident on their left or right side as shown in Figure 8.8.[10] This position relieves pressure on the coccyx and can increase blood flow to the fetus in pregnant women. The top arm and leg can be placed in a flexed position in any range that is comfortable to the resident. Supports should be placed behind the back to keep the resident from rolling to the supine position. Additionally, supports should be placed between the top knee and the bed or other knee and between the top elbow and rib cage or the bed, depending on the location of the elbow joint. These supports will alleviate pressure between the bony prominences in these areas. The pillow underneath the resident’s head should also be adjusted for comfort and alignment checked from the foot of the bed.

Lateral (Side-Lying) Position
The most common rotation of positions for repositioning residents is to rotate them from supine position to lateral position, to supine position, to lateral position on the opposite side. See the “Positioning Supine to Lateral (Side-Lying) Skills Checklist” for the steps to move a resident from the supine to lateral (side-lying) position.
Sims' position is very similar to the lateral position, but the client is always placed on their left side and their left arm is placed behind the body (rather than in front of the body). Sims’ position is commonly used for administration of a suppository or an enema. Depending on your state’s scope of practice, you may be delegated to give an enema, or the nurse may ask you to prepare the patient for an enema by placing them in the Sims’ position as pictured in Figure 8.9.[11]
Sim’s Position
In the prone position, the client is placed on their stomach with their head turned to one side, as seen in Figure 8.10.[12] Pillows should be placed underneath the shins to relieve pressure. Pillows (or wedges) can also be placed on both sides of the patient, and the head pillow should be readjusted for comfort.
Prone Position
Prone is the least commonly used position, especially in older adults due to their neck immobility. This position may be used for a client with a surgical wound on the back side of their body or to improve respiratory status in clients with respiratory conditions like COVID-19.
Actions for maintaining the musculoskeletal system and preventing complications will be discussed in Chapter 11. These actions can be summarized by the phrase, “Use it or lose it,” meaning the functioning of the musculoskeletal system declines quickly when it is not being used. Small, everyday activities help maintain flexibility in joints, muscle strength, and healthy bone density. The NA can help residents maintain their musculoskeletal health by encouraging them to do as many activities for themselves as possible.
While it may be faster to perform ADLs for a resident, allowing them to provide care for themselves not only maintains musculoskeletal function but also gives them a sense of control that can enhance their self-esteem and quality of life. Here are ways NAs can encourage residents to participate in their self-cares:
It is important to note that most injuries that happen to clients and staff occur when clients are being transferred. Safety is an integral component of moving clients and should receive the highest priority. Special consideration should be given to these items to prevent injury from occurring:
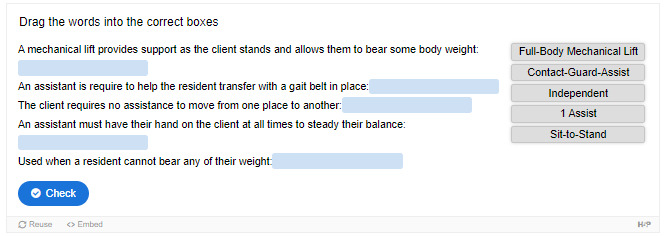
Nursing assistants should always review a client’s care plan for their current transfer status before moving them. Transfer status refers to how a resident moves from one place to the other, such as from a bed to wheelchair or wheelchair to toilet. Physical therapists (i.e., health specialists who evaluate and treat movement disorders) assess clients and make recommendations for how clients should be safely transferred. Transfer status orders are determined by how much body weight a client can independently bear and how much weight an assistant is required to support. Transfer status orders include these types of orders:
When transferring a client using a 1A, 2A, or sit-to-stand transfer method, first assist the resident to move to a seated position on the side of their bed. Residents who can transfer with one of these methods are able to bear some or most of their weight and should be able to move partially on their own. Use your hands on the person’s limbs to direct the movement, and use the lift sheet (similar to when boosting a client up in bed).
Due to heart and circulation changes that occur with age, orthostatic hypotension can occur when a person moves suddenly from a lying to sitting position or from a sitting to standing position. Orthostatic hypotension is a sudden drop in blood pressure that can cause clients to feel dizzy and increase their risk for falls with position changes. Some clients may experience vertigo, a sensation that the room is spinning. To prevent orthostatic hypotension and these symptoms, tell the person to dangle (i.e., sit up on the edge of the bed) for a few moments before continuing with the transfer. Dangling gives the cardiovascular system time to regulate blood pressure and blood flow to the brain, thus preventing dizziness and falls. Ask the client if they are feeling dizzy before you proceed with transferring. See Figure 8.11[1] for illustration of the steps to safely assist a client to a seated position[2]:
Assisting a Resident to a Seated Position
If the resident is having difficulty moving during this procedure, use the lift sheet to pull them closer to you or to assist them from a lying to a seated position. The head of the bed can be raised before they turn on their side to support their core strength and to reduce the weight the assistant must bear. During this entire process, do not use the resident’s limbs to move them but rather move them with the trunk of their body to prevent shear and injury to their limbs and skin.
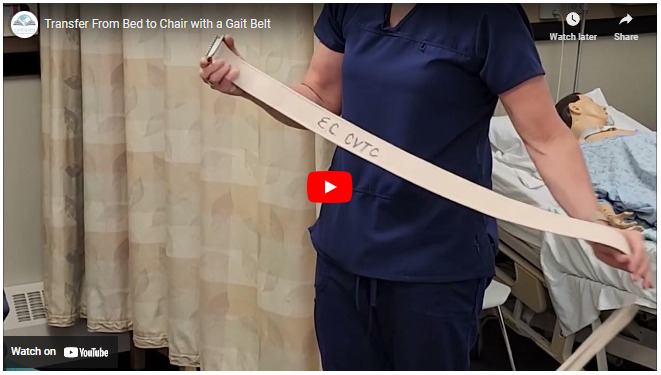
After the person is sitting upright and states they are not experiencing dizziness, apply a gait belt for a 1A or 2A transfer. The gait belt should be placed around their waist while considering the location of their breasts and abdominal folds. See Figure 8.12[3] for an image of applying a gait belt. The fit of the gait belt should be snug, but you should be able to put your fingers underneath the gait belt for support. As the resident stands and their core muscles contract, the gait belt can loosen and tend to slide up, so it is important for it to be snug. If the belt is too long, it can get caught in the patient’s legs during transfer, so tuck the excess length back into the belt. Gait belts should not be used for clients with abdominal wounds or some types of heart conditions; a different transfer method should be in the care plan. Contact the nurse if you have concerns about using a gait belt based on the client’s condition.

Applying a Gait Belt
Place nonskid footwear on the resident before transferring them from the bed to the chair. These preparations should be done before the wheelchair or sit-to-stand is brought closer to the bed to reduce the risk of injury from the resident inadvertently hitting the lift or chair while moving.
The steps to complete a one person assist (1A) are listed in the “Transfer From Bed to Chair With a Gait Belt” Skills Checklist. If a two-person assist (2A) is required, the same steps are used, but the assistants stand on each side of the resident to provide additional support during the transfer.
View the following video showing a transfer of a patient from a bed to a regular chair[4]: Assisting From Bed to Chair With a Gait Belt or Transfer Belt.
Mechanical lifts include sit-to-stand lifts and full-body lifts. Some facilities have full-body mechanical lifts that are attached to the ceiling of the room. See Figure 8.13[5] of an image of a sit-to-stand lift and Figure 8.14[6] of an image of a full-body mechanical lift and mechanical swing. NAs should be aware of agency policy regarding transferring clients using mechanical lifts; for safety purposes, most agencies require two NAs or a nurse and an NA to transfer clients using a mechanical lift.
Sit-to-Stand Lift
Full-Body Mechanical Lift and Mechanical Sling
The legs of portable full-body mechanical lifts can be placed in a closed or open position. The open position provides the greatest stability due to a wide base of support. See Figure 8.15[7] for an image comparing the legs of a portable full-body mechanical lift in a closed and open position.
Portable Full-Body Mechanical Lift With Legs in a.) Closed Position and b.) Open Position
When transferring a client from their bed to wheelchair using a sit-to-stand or portable full-body mechanical lift, the wheelchair should be positioned near the bed while also allowing enough room for the lift to rotate towards the chair. Because the lift will have to slide underneath the bed, check for any cords or equipment under the bed that can cause the lift to get tangled. Raising the bed height just before placing the lift under the bed should also alleviate potential problems.
The lift has greatest stability when its legs are open with a wide base of support, but some beds do not have enough space underneath to allow the legs to be open. If this is the case, open the legs as soon as possible when moving the lift from under the bed to provide a stable base.
Sit-to-stand and full-body lifts have brakes, but brakes should not be applied when the resident is standing in the sit-to-stand or raised off the bed in a full-body lift. (If the client’s weight shifts while the brakes are on, it can cause the lift to tip and endanger the resident, as well as the assistants.)
Before initiating a transfer, verify that the lift will support the weight of the resident. Most mechanical lifts have a weight capacity of 400 pounds. Bariatric lifts are used to support a client weighing 600 or more pounds. See Figure 8.16[8] for locating the weight capacity on a lift.
Weight Capacity of a Mechanical Lift
Full-body mechanical lifts have different types of slings used to lift the client. Slings may be full-body or split-leg (butterfly). The type of sling used is determined by the physical therapist, based on the client’s strength and mobility, and should be noted in the resident’s care plan. A sling has various loops to connect it to the lift and are often color-coded to ensure the resident’s body is in proper position for transferring. See Figure 8.17[9] for images of a full-body sling and Figure 8.18[10] for images of a split-leg (butterfly) sling.
a.) Front of Full-Body Sling; b.) Back of Full-Body Sling; c.) Loops (right)

a.) Front of Split-Leg (Butterfly) Sling and b.) Back of Split-Leg (Butterly) Sling
The top of a full-body sling should be placed above the resident’s head and should end just above the knee joint to avoid hyperextending the knees when they are suspended in the lift. The top of a split-leg (butterfly) sling should be placed at shoulder height, and the bottom of the sling should be around the buttocks. Depending on hip mobility, the split-leg sling may be crossed between the client’s legs or placed around their legs (often referred to as a “basket”). See Figure 8.19[11] for an image of a mannequin prepared to transfer using a crossed sling and Figure 8.20[12] for an image of transferring a mannequin with the sling wrapped around their legs (i.e., a “basket” approach).
a.) Preparing to Transfer With Crossed Sling and b.) Suspended in a Crossed Sling

a.) Preparing to Transfer With a “Basket” Approach b.) Suspended in a Sling With a “Basket” Approach
The handles of the sling should face away from the client, allowing the assistants to position the client in their chair or bed. (Do not move clients by directly contacting their limbs because this can cause injury.)
After transferring a client from a bed to a chair using a full-body sling, the sling should remain under the resident while they are seated in a wheelchair or other chair. When placing the resident back in bed, the sling is then removed. However, when transferring a client using a split-leg (butterfly) sling, it can be removed from underneath the client in the chair and replaced before they are transferred again.
See the Skills Checklists “Transfer From Bed to Chair With Sit-to-Stand” and “Transfer From Bed to Chair With Mechanical Lift” for steps for providing safe transfers with both types of lifts. Each brand of sit-to-stand and mechanical lift has some variances; the facility where you work will provide specific training on their lifts.
Watch the following YouTube video for a demonstration of moving a resident with a sit-to-stand[13]: Aidacare Training Video – Manual Handling – Sit To Stand.
Explore the following YouTube video[14] on a mechanical lift completed with a butterfly or split-leg sling: Aidacare Training Video – Manual Handling – Lie To Sit
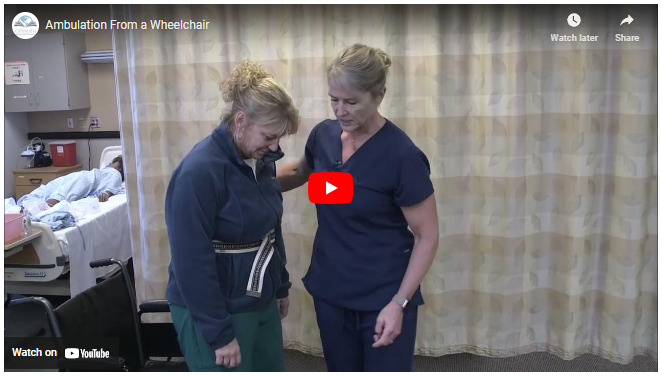
Ambulation is the medical term used for walking. Ambulation provides weight-bearing activity that promotes bone health and joint mobility. A physical therapist will determine if a person can safely walk independently, with the assistance of one or two people, or if they require an assistive device such as a cane or walker. This information is documented in their nursing care plan. Similar to when assisting a client to transfer with a gait belt, the nursing assistant should place nonskid footwear on the person and allow them to dangle on the edge of the bed before standing to ambulate. For specific steps, see the “Ambulation From Wheelchair” Skills Checklist.
If a resident requires assistance with a cane, the cane should be placed on the resident’s stronger side. The resident should step forward with the strong leg and then use the cane and the weaker leg for the next step.
There are three types of walkers: a standard walker, a two-wheeled walker (2WW), and a four-wheeled walker (4WW). The type of walker a resident should use is recommended by the physical therapist. A 2WW or standard walker allows for more support and a slower gait, whereas a 4WW is used by clients with better balance and mobility.
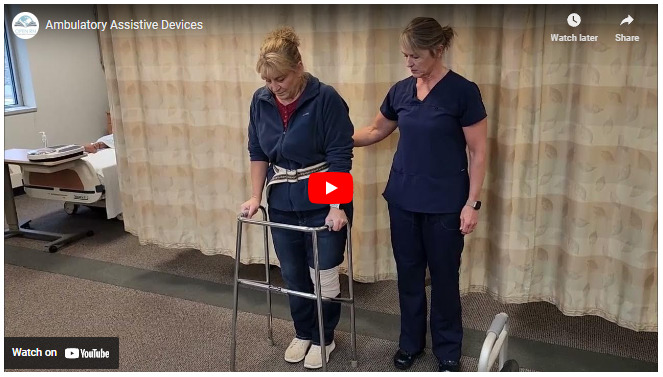
Regardless of the assistive device used for ambulation, the NA should remind the resident to stand up straight and look forward when walking. The resident should be encouraged to take purposeful steps and to not shuffle their feet. The NA should stand to one side of the resident and slightly behind them, with one hand on their gait belt. If the resident has a weaker side, the NA should stand on that side. The NA’s fingertips should be facing upwards underneath the gait belt for proper support. If the resident loses their balance while in this position, the NA’s arm will allow them to use their bicep muscle, rather than their forearm, to steady the client. The bicep is larger and stronger than the forearm and can provide better support.
A second staff member can follow a resident who is ambulating with assistance with their wheelchair in case they experience weakness or dizziness. If the client needs to sit while ambulating, the wheelchair brakes should be applied before they sit, or in an emergent situation, the NA should block the back of the wheelchair with their body to ensure stability when the resident sits.
If a resident starts to fall while standing or ambulating, do not attempt to stop their fall or catch the resident because this can cause you to injure your back. Instead, move behind the patient and take one step back with one leg so you have a wide base of support. Support the patient around their waist or hip area or grab the gait belt. Bend one of your legs and place it between the patient’s legs from behind. Slowly slide the patient down your bent leg, lowering yourself to the floor at the same time. Always protect the resident’s head to prevent head injury. After the resident is on the floor, do not move them. For witnessed or unwitnessed falls, notify the nurse immediately for assessment. After the nurse has completed the assessment and met the resident’s immediate needs, use a mechanical lift to transfer the resident back to a wheelchair or bed. An incident report will be completed by the nurse, and the NA will be asked to give a statement on what occurred and their actions in response to the situation.[2] See Figure 8.21[3] for an image of lowering a resident who is falling to the floor.
Lowering a Client Who is Falling to the Floor
Prosthetics are an addition or attachment to the body that replicates the function of a lost or dysfunctional limb.[1] An orthotic is a support, brace, or splint used to support, align, prevent, or correct the function of movable parts of the body. Shoe inserts are the most common orthotics and are intended to correct an abnormal or irregular walking pattern. Other orthotics include neck braces, back supports, knee braces, and wrist supports.[2] NAs apply prosthetics and orthotics to residents following the therapist’s instructions. Incorrectly applying these devices can cause harm or injury to the resident, so you must understand the correct placement of these supports. If you are unsure, seek guidance from your supervising nurse before placing any prosthetics or orthotics.
One of the main concerns with prosthetic or orthotic devices is skin irritation. Prosthetics typically have a protective sleeve that goes over the limb prior to placing the device. The sleeve gives the prosthetic some security to prevent displacement while also protecting the skin. After the prosthetic is attached, always ask the resident if it is comfortable or if they feel any areas of pressure that may damage the skin. Most orthotics, splints, or braces are padded, but some can be applied over thin clothing. Be sure to review the resident’s nursing care plan regarding how long and at what times any supportive devices should be worn and removed. See Figure 8.22[3] for a device that prevents foot drop.
Supportive Brace to Prevent Foot Drop
Restraints are devices used in health care settings to prevent patients from causing harm to themselves or others when alternative interventions have not been effective. A restraint is a device, method, or process that is used for the specific purpose of restricting a patient’s freedom of movement. While restraints are typically used in acute care settings, they may be used in some circumstances in long-term care settings for safety purposes. However, restraints restrict mobility and can affect a client’s dignity, self-esteem, and quality of life; every possible measure to ensure safety should be considered before a restraint is implemented. An order from a health care provider is required to implement a restraint, and agency policy must be strictly followed.[1]
Restraints include physical devices (such as a tie wrist device), chemical restraints, or seclusion. The Joint Commission defines a chemical restraint as a drug used to manage a patient’s behavior, restrict the patient’s freedom of movement, or impair the patient’s ability to appropriately interact with their surroundings that is not standard treatment or dosage for the patient’s condition. It is important to note that the definition states the medication “is not standard treatment or dosage for the patient’s condition.” Seclusion is defined as the confinement of a patient in a locked room from which they cannot exit on their own. It is generally used as a method of discipline, convenience, or coercion. Seclusion limits freedom of movement because, although the patient is not mechanically or chemically restrained, they cannot leave the area.[2]
Although restraints are used with the intention to keep a patient safe, they impact a patient’s psychological safety and dignity and can cause additional safety issues and, in some cases, death. A restrained person has a natural tendency to struggle and try to remove the restraint and can fall or become fatally entangled in the restraint. Furthermore, immobility that results from the use of restraints can cause pressure injuries, contractures, and muscle loss. Restraints take a large emotional toll on the patient’s self-esteem and may cause humiliation, fear, and anger.[3]
The American Nurses Association (ANA) has established evidence-based guidelines that a restraint-free environment is considered the standard of care. The ANA encourages the reduction of patient restraints and seclusion in all health care settings. Restraining or secluding patients is viewed as contrary to the goals and ethical traditions of nursing because it violates the fundamental patient rights of autonomy and dignity. However, the ANA also recognizes there are times when there is no viable option other than restraints to keep a patient safe, such as during an acute psychotic episode when patient and staff safety are in jeopardy due to aggression or assault. The ANA also states that restraints may be justified in some patients with severe dementia or delirium when they are at risk for serious injuries such as a hip fracture due to falling.[4]
The ANA provides the following guidelines: When restraint is necessary, documentation of application of the restraint should be done by more than one witness. Once restrained, the patient should be treated with humane care that preserves human dignity. In those instances where restraint, seclusion, or therapeutic holding is determined to be clinically appropriate and adequately justified, registered nurses who possess the necessary knowledge and skills to effectively manage the situation must be actively involved in the assessment, implementation, and evaluation of the selected emergency measure, adhering to federal regulations and the standards of The Joint Commission regarding appropriate use of restraints and seclusion.[5]
Nursing documentation is vital when restraints are applied and includes information such as patient behavior necessitating the restraint, alternatives to restraints that were attempted, the type of restraint used, the time it was applied, the location of the restraint, and patient education regarding the restraint. Frequent monitoring according to agency guidelines and provision of basic needs (food, fluids, and toileting) must also be documented.[6]
Any health care facility that accepts Medicare and Medicaid reimbursement must follow federal guidelines for the use of restraints. These guidelines include the following[7]:
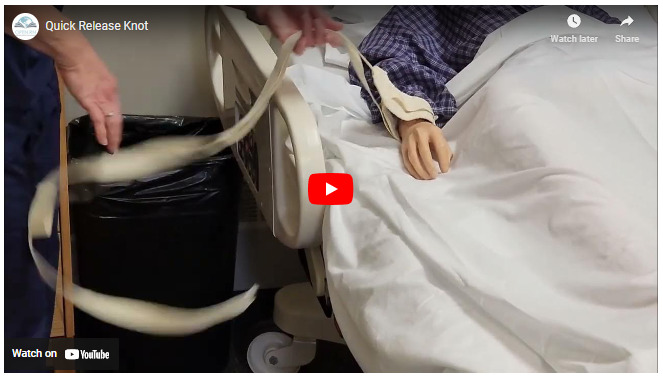
In addition to continually monitoring the site of a physical restraint for skin issues, a physical restraint should only be secured to the bed with a quick-release knot in case of emergency.
Side rails and enclosed beds may also be considered a restraint, depending on the purpose of the device. Recall the definition of a restraint as “a device, method, or process that is used for the specific purpose of restricting a patient’s freedom of movement or access to movement.” If the purpose of raising the side rails is to prevent a patient from voluntarily getting out of bed or attempting to exit the bed, then use of the side rails would be considered a restraint. On the other hand, if the purpose of raising the side rails is to prevent the patient from inadvertently falling out of bed, then it is not considered a restraint. If a patient does not have the physical capacity to get out of bed, regardless if side rails are raised or not, then the use of side rails is not considered a restraint.[9]
Full side rails are generally only found on beds in acute care. In long-term care, beds usually have a transfer loop that is a much smaller side rail. The transfer loop allows the resident to support themselves while repositioning in bed and standing up from the bed. The smaller size of this type of side rail reduces the risk of the resident becoming entrapped and injured from the device. Full side rails may be ordered by the physician if they allow the resident to reposition independently. If a resident’s bed in a long-term care setting has full side rails and they are not used for repositioning, they should always be lowered when care is complete, and a staff member is no longer present in the room. Acute care settings have different regulations regarding full side rails; review specific agency policy.[10]
A hand mitt is a large, soft glove that covers a confused patient’s hand to prevent them from inadvertently dislodging medical equipment such as a catheter, feeding tube, or intravenous (IV) catheter. See Figure 8.23[11] for an image of a hand mitt. Hand mitts are considered a restraint by The Joint Commission if they are used under these circumstances:

Hand Mitt
View the following YouTube video for applying hand mitts[12]: Hand Control Mittens With Tie Closure.
A vest restraint is worn on the upper body and has ties that secure it to a chair or bed frame, allowing the restrained person to sit or lie in bed.
View the following YouTube video on properly using a vest restraint[13]: Criss Cross Vest.
Common items can be considered restraints when used improperly. A general rule is if any device limits the mobility, freedom of movement, or access to one’s body, it is considered a restraint. The resident must be able to independently remove any device that is utilized when directed to do so. This action shows that the resident can cognitively and physically control their environment. Here are some examples of how common devices can be considered a restraint:
There are many interventions available to keep residents safe without applying restraints. When a potentially unsafe behavior is occurring, the health care team should look at all the factors surrounding the behavior to determine the root cause. After the root cause is determined, the staff can implement appropriate redirection. Common risks and appropriate interventions include the following:
If a resident continues to attempt to self-transfer without assistance:
If a resident is agitated or aggressive towards other residents:
If a resident wanders or wants to leave the facility:
Motion sensors, pressure or tab alarms, and wanderguards are all alarms. There are many facilities that choose not to use alarms because they can be disruptive to the environment due to the noise and can reduce the dignity of the resident. If implemented incorrectly, they may not deter the unsafe behavior but merely notify staff the behavior is occurring or has occurred. If an alarm is indicated in the care plan, the NA is responsible for making sure the alarm is functioning and properly placed as indicated in the care plan. Behavioral and environmental interventions, as previously discussed, should be considered before alarms are put in place.
Wanderguard[14]: Prevent Wandering With Smart Caregiver Fall Prevention and Anti-Wandering Products
Pressure alarm[15]: TL-2020 With Corded Bed Pad
Gather Supplies: Four pillows
Routine Pre-Procedure Steps:
Procedure Steps:
Post-Procedure Steps:

Gather Supplies: Gait belt, wheelchair, and nonskid footwear
Routine Pre-Procedure Steps:
Procedure Steps:
Post-Procedure Steps:
Gather Supplies: Wheelchair, lift, and nonskid footwear. Check agency policy for assistance requirements and the client’s care plan for current transfer status.
Routine Pre-Procedure Steps:
Procedural Steps:
Post-Procedure Steps:

Gather Supplies: Mechanical lift, lift sling, second person to assist, and a wheelchair. Review agency policy for mechanical lifts. NOTE: The driver of the lift must be at least 18 years old.
Routine Pre-Procedure Steps:
Procedure Steps:
Post-Procedure Steps:

Gather Supplies: Gait belt, wheelchair, nonskid footwear, and assistive devices if needed (walker or cane)
Routine Pre-Procedure Steps:
Procedure Steps:
Post-Procedure Steps:

A medical term used for walking.
Mechanical lifts that support a client weighing 600 or more pounds.
Good posture principles that prevent musculoskeletal injuries.
Areas of the body where a bone lies close to the skin’s surface, such as the back of the head, shoulders, elbows, heels, ankles, tops of the toes, hips, and coccyx.
A drug used to manage a patient’s behavior, restrict the patient’s freedom of movement, or impair the patient’s ability to appropriately interact with their surroundings, that is not standard treatment or dosage for the patient’s condition.
Tailbone.
Sitting up on the edge of bed for a few minutes before standing to prevent orthostatic hypotension and dizziness.
Specialized soft boots used to support the ankles and keep the heels floated off the bed.
A device used to keep the sheets and blankets off the tops of a client’s toes.
A position where the client is lying on their back with their head elevated between 30 and 90 degrees.
Injury caused to skin when it is rubbed by clothing, linens, or another body part.
A large, soft glove that covers a confused patient’s hand to prevent them from inadvertently dislodging medical equipment such as a catheter, feeding tube, or intravenous (IV) catheter.
The loss of independent control of one’s body to change positions and function safety within the environment.
A position that places the client on their left or right side to relieve pressure on the coccyx or increase blood flow to the fetus in pregnant women.
The ability to move one’s body parts, change positions, and function safely within the environment. It is one of the most important factors for remaining independent.
A sudden drop in blood pressure that can cause clients to feel dizzy and increase their risk for falls.
A support, brace, or splint used to support, align, prevent, or correct the function of movable parts of the body.
Health specialists who evaluate and treat movement disorders.
Localized damage to the skin or underlying soft tissue, usually over a bony prominence, as a result of intense and prolonged pressure and/or shear.
A position where the client is placed on their stomach with their head turned to one side.
An addition or attachment to the body that replicates the function of a lost or dysfunctional limb.
Devices used in health care settings to prevent patients from causing harm to themselves or others when alternative interventions are not effective.
The confinement of a patient in a locked room from which they cannot exit on their own. It is generally used as a method of discipline, convenience, or coercion.
Injury to skin that occurs when skin moves one way, but the underlying bone and muscle stay fixed or move the opposite direction.
A position similar to the lateral position, but the client is always placed on their left side and their left arm is placed behind their body.
A separation of skin layers caused by shear, friction, and/or blunt force.
A position where the client is lying flat on their back.
How a resident moves from one place to the other, such as from a bed to wheelchair or a wheelchair to toilet.
Orders that establish how much assistance is required for moving a client based on how much body weight they can independently bear and how much weight an assistant is required to support. Transfer status orders include independent, contact-guard-assist (CGA), 1 assist (1A), 2 assist (2A), sit-to-stand lift, or full-body mechanical lift.
A sensation that the room is spinning.
Licensed under a Creative Commons Attribution 4.0 International License. To view a copy of this license, visit https://creativecommons.org/licenses/by/4.0/.
Your browsing activity is empty.
Activity recording is turned off.
See more...